MegaBonk is an action-packed roguelike survival game developed by indie developer Ved that became an instant sensation in the gaming community. Released on Steam, MegaBonk sold over 1 million copies in just 2 weeks and has accumulated over 43,000 overwhelmingly positive reviews. In MegaBonk, you fight through endless waves of enemies in randomly generated maps, collecting experience points to level up and choosing from random upgrades to create powerful build combinations that scale exponentially.
The core gameplay of MegaBonk revolves around survival and strategic decision-making. The game features 20 unique playable characters, each with their own passive abilities and starting weapons that fundamentally change your playstyle. As you progress through your MegaBonk runs, you'll unlock 29 different weapons with diverse mechanics ranging from melee swords and axes to ranged rifles and bows, as well as area-of-effect magic attacks like the Flamewalker and Lightning Staff. Combine these weapons with 23 game-changing tomes and over 78 items to create unstoppable synergies that can take you to 100,000+ enemy kills in a single run.
MegaBonk's addictive gameplay loop revolves around strategic build crafting and meta progression. Every run is different thanks to procedural upgrade paths, randomized item drops, and the exponential power scaling from item synergies. The game features a robust progression system with 240+ quests to complete, multiple boss encounters that test your build optimization, and weekly leaderboards where players compete for the highest kill counts. Whether you're mastering the meta Kevin + Mirror immortality combo, building a poison lifesteal setup, experimenting with high-risk curse builds, or pushing attack speed to its limits, MegaBonk offers endless replayability for fans of roguelike games like Vampire Survivors, Brotato, and 20 Minutes Till Dawn.
What makes MegaBonk special is its depth of build variety and the satisfying feeling of discovering powerful synergies. The game's stat system includes over 30 different statistics ranging from HP, Shield, and Armor for defense to Damage, Crit Chance, Attack Speed, and Projectile Count for offense. MegaBonk rewards experimentation and game knowledge, allowing skilled players to turn seemingly weak characters into unstoppable forces through clever item and tome combinations. With regular updates from the developer, an active Discord community, and thousands of user-created builds being shared daily, MegaBonk has established itself as one of the most engaging roguelike survival experiences available on Steam.
Explore every character, weapon, tome, and item in MegaBonk. Master their stats, effects, and synergies to dominate your runs.
Discover all playable characters with unique abilities and starting weapons.


Master every weapon from melee swords to ranged guns and magic staffs.
Unlock powerful tomes that fundamentally change your build scaling.

Discover game-changing items with powerful effects and synergies.



Discover the best characters in MegaBonk ranked by their overall power, versatility, and ease of use. Updated for the latest patch.
Our MegaBonk character tier list ranks all 20 playable characters based on their passive abilities, starting weapons, stat distributions, and overall synergy with meta builds. This tier list considers both beginner-friendliness and high-level optimization potential. Characters in S-tier are considered game-breaking with the right builds, while lower tiers may require more skill or specific setups to shine.

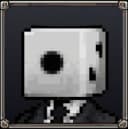
Passive: Lucky Dice - Dicehead is considered the most powerful character in MegaBonk thanks to his RNG-based passive ability that can grant massive stat boosts. His passive rolls a die every few seconds, providing random bonuses to damage, attack speed, crit chance, or movement speed. With the right luck items and the Luck Tome, Dicehead can consistently roll maximum values, making him unstoppable in the late game. Best paired with weapons that have fast hit rates to maximize crit potential. Ideal builds include attack speed stacking and crit-focused setups.

Passive: Overcharge - CL4NK dominates MegaBonk with his electric-based passive that chains lightning between enemies. Every few attacks, CL4NK releases an electric discharge that arcs to nearby enemies, dealing bonus damage and applying a shock effect. This passive scales exceptionally well with attack speed and projectile count, making CL4NK one of the best characters for clearing massive enemy waves. The electric chains have infinite range once upgraded, allowing for screen-wide damage. Perfect for builds focused on the Lightning Staff, attack speed items, and the Projectile Tome.

Passive: Multishot Arrows - Robinette is the queen of projectile-based builds in MegaBonk. Her passive fires multiple arrows with every attack, effectively doubling or tripling her damage output depending on upgrades. This makes her exceptional with weapons like the Bow, Revolver, and Sniper Rifle. When combined with the Projectile Tome and items that boost projectile count, Robinette can fill the entire screen with arrows, making her one of the safest and highest DPS characters in the game. Her starting weapon synergizes perfectly with her passive, making early game progression smooth.
High damage multipliers and critical strike focus make Bandit excellent for speedrun strategies. Best with crit-focused builds and the Precision Tome.
Tank character with high HP and armor scaling. Perfect for beginners learning the game mechanics. Excels with defensive items and HP-based builds.
Lifesteal specialist who converts damage into healing. Dominates with the Bloody Tome and lifesteal-focused items for near-immortality.
Shield-based character with excellent survivability. Strong defensive passive that blocks damage periodically, ideal for learning boss patterns.
Speed-focused character perfect for movement-based builds and kiting strategies.
Evasion specialist with dodge mechanics. Requires skill but rewards experienced players.
Unique gravity-based passive. Situationally powerful but inconsistent.
Strength-based character with raw damage output. Solid for melee weapon builds.
Vehicle-themed character with mobility bonuses. Fun but not meta-defining.
Stealth mechanics provide interesting gameplay but lower overall DPS potential.
These MegaBonk characters are perfect for beginners or offer niche playstyles. While they may not dominate the meta, they provide a great introduction to the game's mechanics and can still achieve strong runs with optimized builds.
Master the most powerful build strategies in MegaBonk. These meta builds have been proven to reach 100,000+ kills and dominate the leaderboards.
In MegaBonk, build synergy is everything. The difference between a mediocre run and a record-breaking one often comes down to understanding how items, tomes, and weapons interact with each other. The builds below represent the current meta strategies that experienced players use to achieve the highest scores. Each build focuses on exponential scaling through carefully selected item combinations.


The Holy Trinity is the foundation of almost every high-scoring MegaBonk run. This build revolves around stacking three critical tomes: XP Tome, Curse Tome, and Luck Tome. The XP Tome increases your leveling speed, allowing you to get more upgrade choices faster. The Curse Tome multiplies enemy difficulty but dramatically increases item quality and drop rates. The Luck Tome improves your chances of getting rare and legendary upgrades. Together, these three tomes create a feedback loop where increased difficulty leads to better items, which allows you to handle even higher difficulty, creating exponential power scaling.
When to use: Start acquiring these tomes around level 10-15. Focus on XP Tome first to accelerate your leveling, then grab Curse Tome when you have solid defensive foundations (HP, armor, or lifesteal). Add Luck Tome once you're comfortable with the current difficulty. The key is timing - grab Curse Tome too early and you'll be overwhelmed; too late and you miss out on better loot. This build works with any character but excels with Dicehead (luck synergy) and Robinette (can handle high difficulty with projectiles).
Complementary items: Clover (+luck), Cursed Doll (curse synergy), Golden Glove (XP gain), Battery (faster upgrades), and any lifesteal items for sustainability.


This is MegaBonk's most broken defensive combination. Kevin is an item that grants you a revive when you would die, consuming the item in the process. The Mirror item duplicates another item's effect. When you combine Kevin with Mirror, you gain multiple revives, effectively making you immortal for most of the run. Each time you die, Kevin triggers, you revive with full HP, and the Mirror creates another Kevin, giving you another life. With enough mirrors and kevins, you can have 5-10+ lives, making it nearly impossible to lose.
How to execute: Your first priority is finding a Kevin - check shops and treasure chests religiously. Once you have Kevin, immediately look for Mirror items. Stack as many mirrors as possible (3-5 is ideal). This build allows you to play extremely aggressively and take risks with Curse Tome stacking that would normally be suicidal. It's particularly powerful on characters with high damage output but poor defense, like Bandit or Ninja.
Best paired with: Curse Tome (since you can't die easily), Glass Cannon items (high damage, low HP), and aggressive positioning to maximize DPS. Works excellently with any character but is especially powerful on those who struggle with survivability.

Attack speed is the single most important stat in MegaBonk for scaling damage. This build focuses exclusively on maximizing attacks per second, turning even weak weapons into screen-clearing monsters. The strategy is to stack every attack speed item and tome you can find, including Battery, Turbo Socks, Turbo Skates, and the Cooldown Tome. With maxed attack speed, weapons like the Sword, Katana, and Revolver attack so fast they become continuous streams of damage.
Scaling mechanics: Attack speed in MegaBonk has diminishing returns, but the breakpoint is very high. Focus on reaching 200-300% attack speed for most weapons. Some weapons like the Sword scale particularly well since each swing can hit multiple enemies. Combine this with the Projectile Tome if you're using ranged weapons, as attack speed multiplies your effective projectile count. CL4NK is the best character for this build due to his electric passive triggering more frequently.
Required items: Battery (cooldown reduction), Turbo Socks/Skates (movement and attack speed), Cooldown Tome (all cooldowns reduced), Time Bracelet, and any items with attack speed bonuses. Prioritize attack speed over raw damage in every upgrade choice.

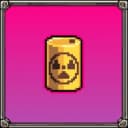

One of MegaBonk's safest and most consistent builds, this strategy combines poison damage-over-time with lifesteal to create a nearly unkillable character. Poison in MegaBonk deals damage over time and stacks infinitely, meaning the longer enemies survive, the more damage they take. Lifesteal converts a percentage of your damage into healing. When you combine these mechanics, you create a feedback loop: poison deals massive damage, which heals you for massive amounts, keeping you alive indefinitely.
Core items: Leeching Crystal (lifesteal), Toxic Barrel (poison application), Gas Mask (poison damage boost), Bloody Tome (lifesteal multiplier), and any HP-boosting items to maximize your healing cap. The Poison Flask weapon is ideal for this build, but it works with any weapon that can apply poison. Vlad is the perfect character for this build due to his innate lifesteal passive.
Strategy: Focus on survivability early game with HP and armor. Once you have basic lifesteal, start adding poison items. The build comes online when you have 3-4 poison items plus Bloody Tome. At this point, you can facetank almost any enemy or boss while your poison damage heals you faster than you take damage. Excellent for beginners learning boss patterns.
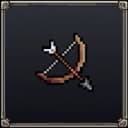
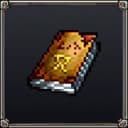
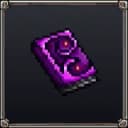
Turn MegaBonk into a bullet hell game - but you're the one creating the bullets. This build focuses on maximizing projectile count, turning single-shot weapons into multi-projectile screen-clearing machines. With the right setup, you can fire 10-20+ projectiles per attack, each with ricochet or piercing, covering the entire screen in damage. This is one of the highest DPS builds in MegaBonk when fully optimized.
Best weapons: Bow, Revolver, Sniper Rifle, or any ranged weapon benefits massively from this build. The Bow is particularly strong as it naturally fires multiple arrows with Robinette. Essential tomes include Projectile Tome (adds +projectiles to all attacks) and Quantity Tome (duplicates your attacks). Combine with attack speed items to fire your projectile walls more frequently.
Scaling path: Start with your ranged weapon, prioritize attack speed upgrades, then add Projectile Tome around level 15-20. Stack projectile count items (usually +1 or +2 per item), then add piercing or ricochet for coverage. Robinette is the god-tier character for this build, but it works on any character. Late game, you'll fill the screen with so many projectiles that enemies die before they reach you.
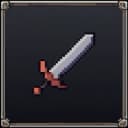
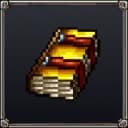
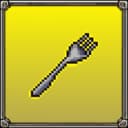
Become an unstoppable melee juggernaut with screen-wide weapon swings. This MegaBonk build focuses on increasing weapon size and area-of-effect until your melee attacks cover the entire screen. The Sword is the ideal weapon, as it swings in a wide arc that scales with size bonuses. With maximum size upgrades, your sword swings will literally cover from edge to edge, hitting hundreds of enemies per swing.
Core strategy: Acquire the Size Tome as your first major tome (around level 10-15). Stack every size-increasing item you find: Giant Fork, Big Bonk, and any +range or +size upgrades. Combine with attack speed so your massive swings happen faster. Add knockback items to keep enemies at bay while you clear waves. This build is extremely satisfying to play as you watch your weapon grow to ridiculous proportions.
Character recommendations: Works with any melee character, but Monke (raw damage) and Sir Chadwell (tankiness) excel. Pair with defensive items since you need to be relatively close to enemies. Late game, combine with the Holy Trinity tomes for maximum scaling potential.
New to MegaBonk? Start here. Essential tips and strategies to help you survive your first runs and understand the game's core mechanics.
Your first character choice in MegaBonk matters more than you might think. While all characters are unlockable eventually, starting with a beginner-friendly character makes the learning curve much smoother. We strongly recommend Sir Oofie or Fox for your first 5-10 runs.
Sir Oofie is the tankiest beginner character with high HP and armor, making him very forgiving for new players still learning enemy patterns and game mechanics. His passive ability provides damage reduction, allowing you to make positioning mistakes without instantly dying. This gives you time to understand how different weapons work and how to dodge effectively.
Fox offers a balanced approach with decent speed and a versatile passive ability. He's perfect if you want a more mobile playstyle while still being forgiving. Fox teaches you proper kiting and movement while his abilities work well with most weapon types. Avoid advanced characters like Dicehead, CL4NK, or Ninja until you understand the core game mechanics, as they require specific build knowledge to shine.
Movement is 50% of MegaBonk's gameplay. The most common beginner mistake is standing still or moving in straight lines. Enemies in MegaBonk swarm from all directions, and poor movement will get you surrounded and killed quickly. Practice circle strafing - moving in circular patterns around groups of enemies while attacking. This keeps enemies grouped together (easier to hit with AoE) while maintaining safe distance.
Always keep moving, even when there's no immediate threat. Standing still makes you an easy target for ranged enemies and bosses. Use your mini-map constantly to identify enemy clusters and safe pathways. When overwhelmed, don't panic - pick a direction and commit to breaking through the enemy line rather than trying to dodge in place.
Fall damage warning: MegaBonk has fall damage! Avoid jumping off high ledges, especially early game when your HP is low. One poorly-timed jump can end your run. If you need to descend, look for ramps or stairs instead.
This is MegaBonk's most important lesson: attack speed scales better than damage in almost every situation. When you level up and get upgrade choices, new players instinctively pick "+50% damage" over "+30% attack speed." This is usually wrong. Attack speed increases your DPS (damage per second) multiplicatively while also providing better crowd control, faster shield breaking, and more consistent healing from lifesteal items.
Think of it this way: if you deal 100 damage per hit and attack once per second, that's 100 DPS. If you increase damage by 50%, you now deal 150 DPS. But if you increase attack speed by 50%, you attack 1.5 times per second, dealing 150 DPS - the same result. However, attack speed also gives you more hits, which means more critical strikes, more on-hit effects, and faster shield breaking. Always prioritize attack speed until you're attacking 2-3 times per second, then balance between attack speed and damage.
Key attack speed items: Battery, Turbo Socks, Turbo Skates, Time Bracelet, and the Cooldown Tome. If you see these in shops, buy them immediately.
MegaBonk's progression system revolves around gaining XP from defeated enemies, leveling up, and choosing from random upgrade options. Each level gives you 3-4 choices of varying rarity: Common (white), Rare (blue), Epic (purple), and Legendary (orange). Higher rarities aren't always better - a Common attack speed upgrade might be more valuable than a Legendary niche item you don't need.
Early game (levels 1-15), prioritize: attack speed, HP, and pickup range. These stats help you survive and scale into late game. Mid game (levels 15-30), start specializing your build - if you've committed to ranged weapons, grab projectile count; if melee, grab knockback and lifesteal. Don't spread your stats too thin trying to do everything.
Reroll mechanic: You can reroll your upgrade choices once per level for free (sometimes more with items). If you see only bad options, always reroll! Don't settle for upgrades that don't fit your build direction. The XP Tome increases your leveling speed, giving you more total upgrades over the course of a run, making it one of the best tomes for any build.
Before attempting serious runs in MegaBonk, spend your first few hours unlocking characters and upgrading your meta-progression. The game has over 240 quests that reward silver (the currency) and unlock new content. Silver is used to purchase permanent upgrades that make all future runs easier, such as starting with more HP, increased XP gain, better shop prices, and unlocking new characters and weapons.
Quest priority: Focus on easy quests first - things like "Defeat 1000 enemies total," "Reach level 20," or "Complete 10 runs." These accumulate naturally as you play and provide steady silver income. Don't stress about difficult quests like "Reach 50,000 kills" early on; they'll come naturally as you improve.
Silver spending tips: First, unlock all characters (they're cheap). Second, invest in silver gain upgrades - these multiply your future earnings. Third, buy starting HP and damage bonuses. Avoid cosmetic purchases until you've maxed out power upgrades. The more you invest in meta-progression early, the easier all future MegaBonk runs become.
The Curse Tome is MegaBonk's risk-reward mechanic. Each curse tome you pick increases enemy difficulty, HP, damage, and spawn rate by a significant amount - but also dramatically improves item quality and drop rates. The question new players always ask: "When should I take my first curse tome?"
The answer: Only take your first Curse Tome when you have solid defensive foundations. You need at least one of the following: 1) High HP pool (200+ HP), 2) Armor or shields (50+ armor), 3) Lifesteal items (healing you on attack), or 4) The Kevin + Mirror combo (revives). If you take Curse Tome too early with no defense, enemies will kill you in 2-3 hits and you'll be overwhelmed instantly.
Ideal timing: Your first Curse Tome should come around level 15-20, once you've established your build direction and have survivability. Your second curse tome can come around level 30-35. Most successful MegaBonk runs stack 2-4 curse tomes total. More than 4 becomes extremely difficult even for experienced players. Remember: dead players get zero loot, so prioritize survival over greed when deciding whether to add another curse tome.
MegaBonk has over 70 items, which can be overwhelming for beginners. Some items are universally good regardless of build, while others are situational. Here are the must-grab items when you see them in shops or treasure chests:
Items to avoid early: Cursed Doll (adds curse without the tome benefits), Glass Cannon items (high damage but reduce HP), and ultra-niche items like Quins Mask or Za Warudo unless you understand their mechanics. Save your silver for reliable, universally-good items in the early game.
MegaBonk runs are structured around clearing tiers and using teleporters to advance to harder zones. Each tier increases enemy difficulty but also improves loot quality. New players often make one of two mistakes: progressing too fast (entering next tier undergeared) or progressing too slow (spending too long farming when they're already strong enough).
When to progress: Take the teleporter to the next tier when: 1) You're comfortably clearing enemies without taking much damage, 2) You're around level 15-20 for tier 2, level 30-35 for tier 3, 3) You have at least one tome and a few items, and 4) You're not seeing many treasure chests or shops in your current tier (they spawn less frequently as time goes on).
Map awareness tips: Keep an eye on your mini-map in the corner - it shows enemy positions, treasure chests, shops, and teleporters. If you see a treasure chest icon, prioritize reaching it as chests contain the best loot. Always clear the area around shops before shopping to avoid being attacked mid-purchase. Before entering a boss fight (bosses spawn periodically), make sure you're at full HP and have cleared nearby enemies to avoid getting sandwiched.
Everything you need to know about MegaBonk